
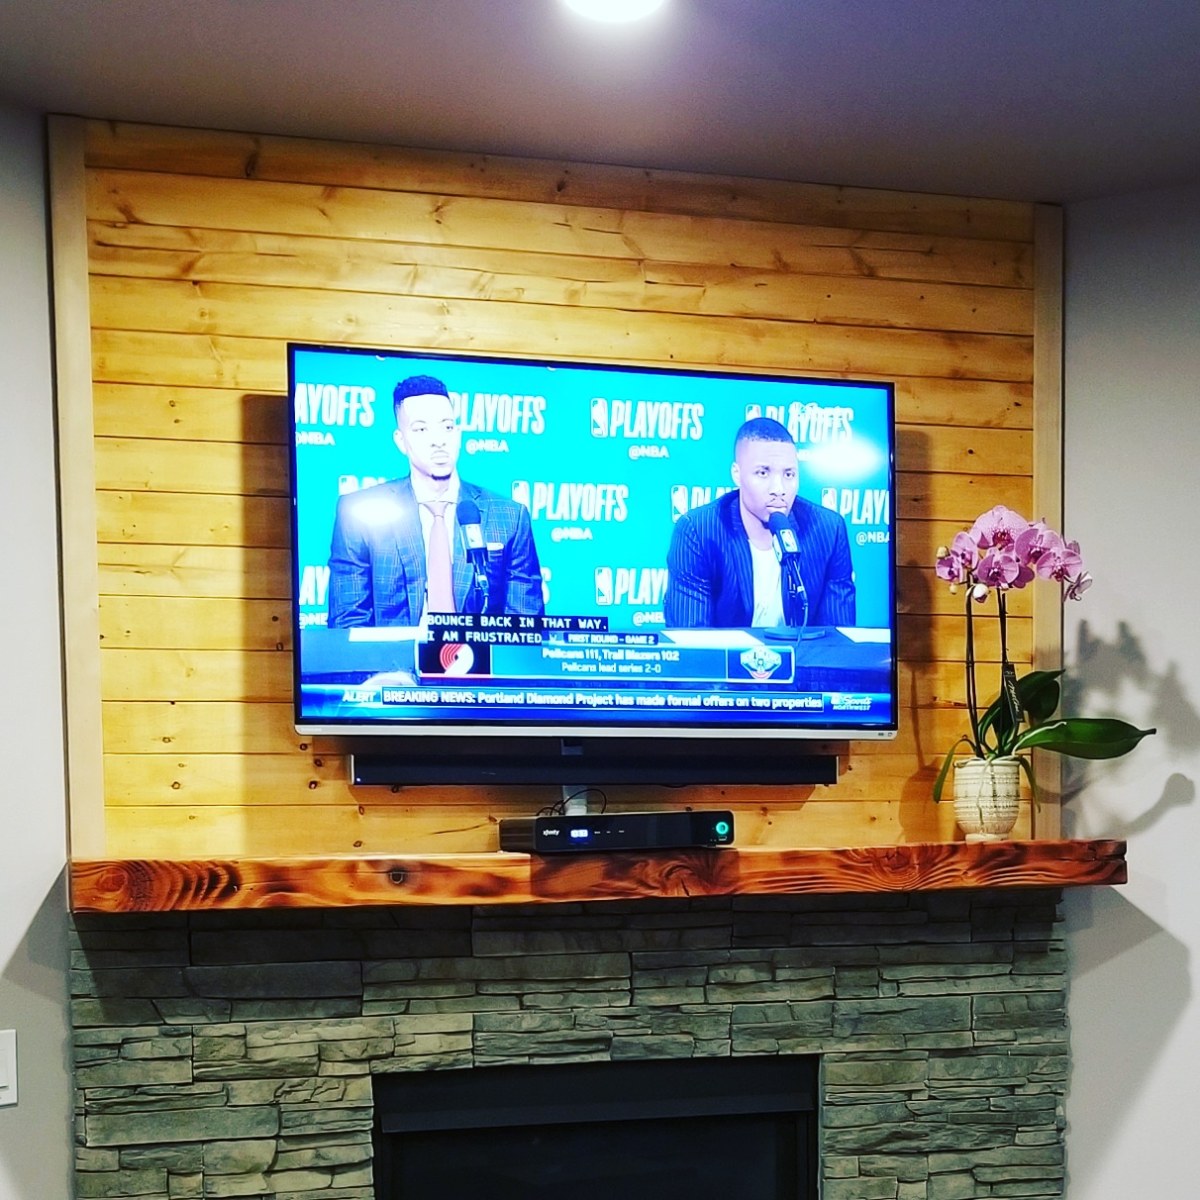
For those new to the blog, when we bought our new house (see Chateau Enginerd tab/category for more info) the builder’s contract painter wanted more money to paint accent walls and the ceiling even though the interior was unpainted at the time. This is why our entire house was painted the same shade of Standing Ovation from Behr with the trim in white, Quiet on the Set, both in eggshell.

To break up the monotony of the color, my friend E and I researched possible fireplace and decorating hacks to upgrade the house and add some texture. Our goal was to use as many of the materials and tools we already had in the garage, like the stain and circular saw, to spend less than $50 on the project. (Since I had a Lowe’s $20 gift card from a past work recognition event, the final material cost was less than expected. If you don’t have stain or the nailer, your expenses will be closer to $200, which is still a nice deal.) We were surprised that we were able to meet the goal and have no scrap or rework even though this was our first time operating a nail gun on parts measured and cut on the fly!
Here’s what you will need to get the look shown on the post header picture:
Materials and equipment
- Qty 2 Pine Board kit 3x x 5/16″ x 8ft – $13 at Lowe’s.
- 18 gauge Brad nailer or equivalent nailer – This will depend on your preference. See The Family Handyman blog for info as to how to operate a nailer and figure out which nailer is best for your project.)
- 2 inch brad nails – driven into studs. (1 1/4″ works too if the boards will be purely decorative)
- Stud finder
- Circular or miter saw
- Wood stain
- Rollers, rags and paint pan
- Pliers
- Rubber mallet
- Ladder
- Personal protective equipment (safety glasses, paint gloves, ear protection)
- Drill and required tools to take down the TV wall mount.
- Optional: trim kit. Hemlock 2 3/4″ moulding cut to length.
The Ryobi cordless brad nailer I used was perfect for the job at hand. The expense of acquiring it added $135 dollars to the project’s bottom line but it was well worth it. Any carpenter or handyman will charge around $60 and hour, and it took us about five hours total to complete the task including removing the TV and cable box and reinstalling them.
After removing all the equipment off the wall, the process to install the boards was pretty straight forward:
- Find and mark studs.
- Measure the wall at each board location.
- Measure, mark and cut the boards face down with the saw. Sand down the edges. This ensures that the blowout is on the back side of the boards and doesn’t ruin their appearance.
- Prop shiplap board against the wall and drive two nails into each stud. Note: We started bottoms up to have gravity help us stabilize the first board. Command strips are a good substitute for a second pair of hands for the first board.
- Lock subsequent boards into the groove and drive two nails into each stud.
- Stain.

The last board didn’t fit because it was about 3/4″ too tall or wide so we designed a quick guide to rip it. The line between the ceiling and the last board wasn’t perfectly flat so E sanded down the excess material to fit in the board into place. A few mallet hits later, we were done!
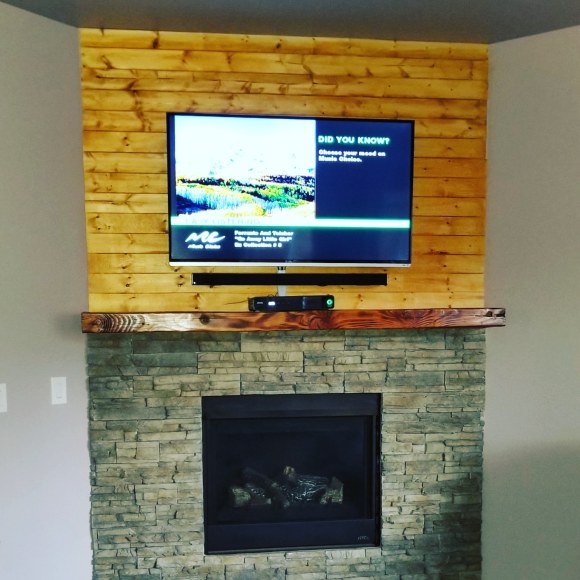
If you want to add the optional trim, measure the distance between the ceiling and mantle or lowest point of the boards, cut to size and install with finishing nails. Stain or poly to protect the wood. Easy peasy!
The ease of installation, especially without the need of glue or adhesive, was such a joy that we will be using this same technique on the laundry room, master bathroom and bedroom.
Stay tuned for updates on how that turns out!!

